In this article, we will explore a delicious and easy-to-prepare recipe.
Indulge in Delicious Red Velvet Pancakes
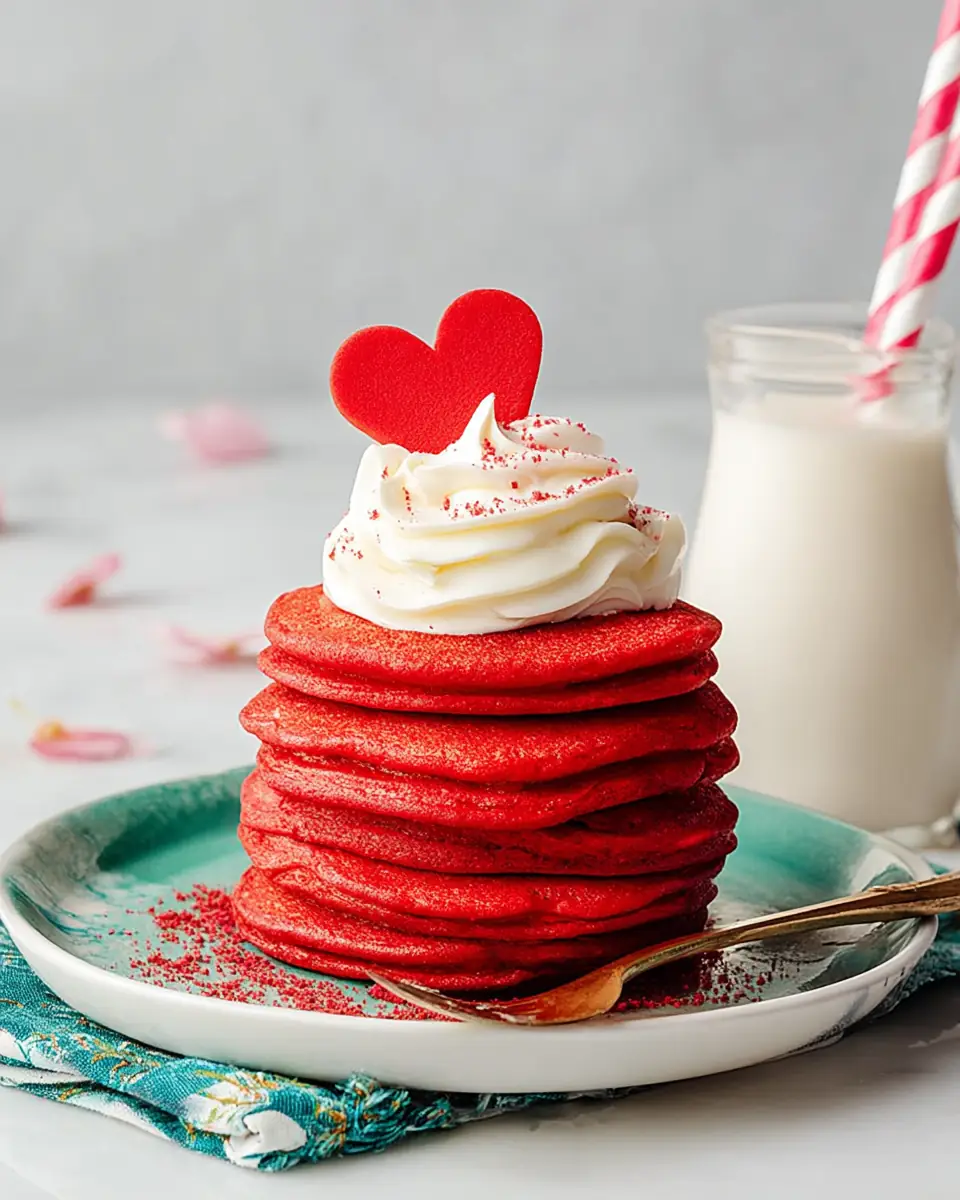
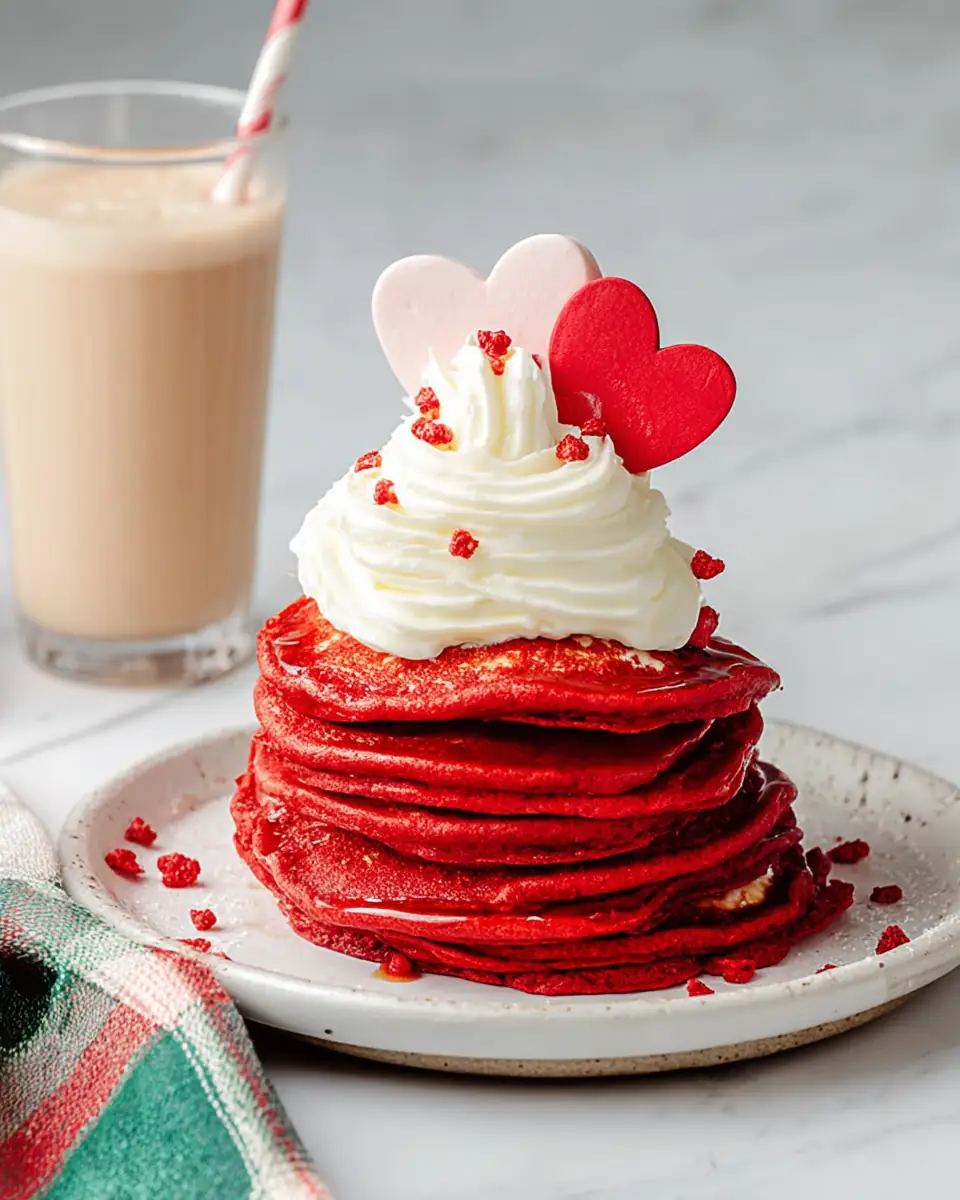
If you’re a fan of both pancakes and the classic red velvet cake, then you’re in for a treat with these Red Velvet Pancakes. Perfectly fluffy and vibrantly red, these pancakes are a delightful twist on your regular breakfast stack, offering a fun and festive option for special occasions or a sweet weekend brunch.
Ingredients You’ll Need:
To craft these delectable pancakes, gather the following ingredients:
- 1 cup (120g) all-purpose flour
- 2 tablespoons granulated sugar
- 1 tablespoon cocoa powder
- 1 teaspoon baking powder
- ½ teaspoon baking soda
- ¼ teaspoon salt
- ¾ cup (177ml) buttermilk
- 2 large eggs
- 2 tablespoons melted butter
- 1 teaspoon vanilla extract
- 1-2 tablespoons red food coloring
- Sprinkles and whipped cream for topping
Step-by-Step Instructions:
Preparing the Batter
Mix the Wet Ingredients:
- In a large mixing bowl, combine the buttermilk, sugar, eggs, melted butter, and vanilla extract. Whisk until the mixture is smooth and well integrated.
Incorporate the Dry Ingredients:
- Sift in the flour, cocoa powder, baking powder, baking soda, and salt into the wet mixture. Stir gently until just combined. It’s important not to overmix; a few lumps in the batter are perfectly fine.
Add the Color:
- Gradually add the red food coloring. Start with a few drops and mix, adding more until you achieve your desired shade of red.
Cooking the Pancakes
Prepare the Cooking Surface:
- Heat a non-stick skillet or griddle over medium heat and lightly grease it.
Cook the Pancakes:
- Pour about ¼ cup of batter onto the skillet for each pancake. Cook until bubbles form on the surface, then flip and cook the other side until lightly browned. Repeat this process until all the batter is used.
Serving
- Serve with Flair:
- Serve the red velvet pancakes warm, adorned with a generous sprinkle of colorful sprinkles and a dollop of whipped cream.
Tips for Perfect Pancakes:
- Mixing: Whisk the dry ingredients thoroughly before adding them to the wet ingredients to ensure even distribution.
- Avoid Overmixing: Overmixing can lead to rubbery pancakes. A gentle stir is all it takes.
- Rest the Batter: Allow the batter to rest for 2-3 minutes before cooking. This helps the pancakes rise better.
- Cooking Surface: Use a large skillet or griddle and ensure there’s enough space for the pancakes to cook evenly.
- Cleaning Between Batches: Wipe down the skillet or griddle between batches to prevent sticking.
Substitutions and Variations:
- Buttermilk Substitute: If you don’t have buttermilk, you can easily make your own. Check out my post on how to make buttermilk at home.
- Spice It Up: For a richer flavor profile, consider adding a dash of cinnamon or nutmeg to the batter.
- Gluten-Free Version: Swap out the all-purpose flour for a gluten-free flour blend to make these pancakes gluten-free.
Storage:
- Refrigeration: Store any leftover pancakes in an airtight container in the fridge for up to 2 days.
Nutritional Information:
Each serving of these red velvet pancakes contains approximately 253 calories, 33g of carbohydrates, 8g of protein, and 10g of fat. They’re a sweet indulgence that fits into many dietary plans.
Whether you’re celebrating a holiday, a birthday, or simply treating yourself to something special, these Red Velvet Pancakes are sure to impress. Serve them with a side of your favorite fresh fruits, and watch them disappear from the plate in no time! Enjoy this delightful breakfast treat, and let the vibrant colors and rich flavors brighten your day.

Red Velvet Pancakes
Ingredients
Equipment
Method
- In a large mixing bowl, whisk together the buttermilk, sugar, eggs, melted butter, and vanilla extract.
- Sift in the flour, cocoa powder, baking powder, baking soda, and salt and stir until just combined. Do not overmix; a few lumps are okay.
- Then, add a few drops of red food coloring and mix. Add a little bit more at a time until you reach the desired color.
- Heat a non-stick skillet or griddle over medium heat and lightly grease it.
- Pour about ¼ cup of batter onto the skillet for each pancake. Cook until bubbles form on the surface of the pancake, then flip and cook the other side until lightly browned. Repeat until all the batter is used.
- Serve the red velvet pancakes warm, topped with sprinkles and a dollop of whipped cream.